
If you are looking for an introductory canning recipe to get your feet wet, this mixed berry jam recipe is for you!
Kid approved and so simple to make? You know I had to share this recipe!
We hosted some friends for a playdate, and the menu was decided – simple. Fruit and peanut butter jelly sandwiches. We had long since eaten through our strawberry freezer jam, but when I realized I had some mixed berries still in the freezer, I tried my hand at this mixed berry jam.
Boy, it did not disappoint!
Here’s how to make mixed-berry freezer jam without pectin.
Pin this post for later!
What You’ll Need
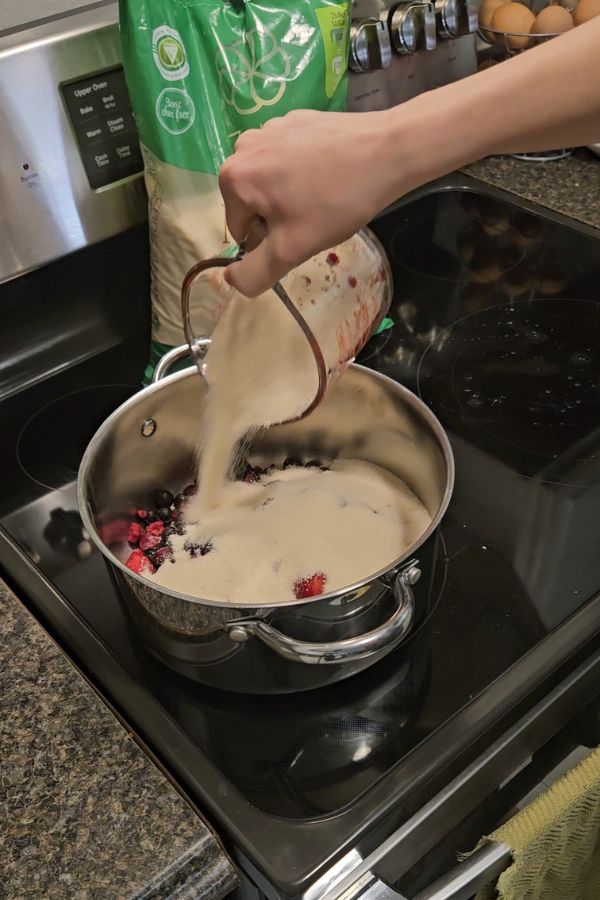
Gather an 8-quart pot, a potato masher, sugar, lime juice, and mixed berries. For this recipe, I recommend using a blend of strawberries, raspberries, and blueberries. If you deviate from that recipe, I can’t guarantee the same results.
How to Make Mixed Berry Jam With No Pectin
For a printable recipe card, scroll to the bottom of this blog post!
Add your berries (I used frozen berries for this recipe), lime juice, and sugar to your pot over medium-low heat on the stovetop. Stir occasionally so the berries and sugar don’t scorch.


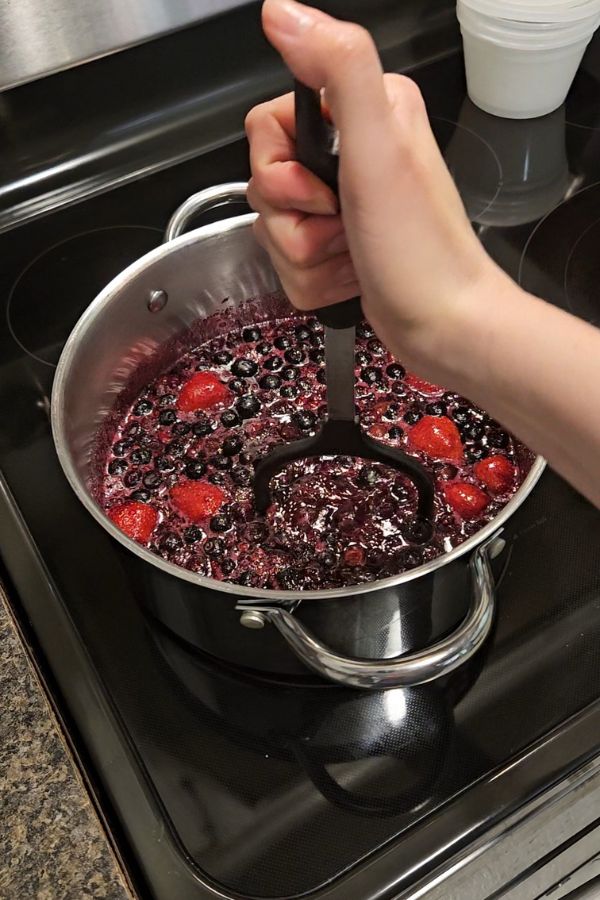
When the berries have warmed through, about 10 minutes or so, run your potato masher through the berries. The consistency of the berries will be to your family’s preference, but I recommend mashing until only a few chunks remain. This won’t be a creamy or smooth consistency.
The mashing will release the fruit pectin within the berries. That, combined with the heat, is what will help your homemade berry jam to gel and firm up.

At this point, stick a plate in the fridge or freezer so it chills. You will need this to test the viscosity of your jam in a bit!
Let the mixture simmer on the stovetop for at least 20 minutes. Again – let the heat do its work to promote the thickening properties of the natural pectin!
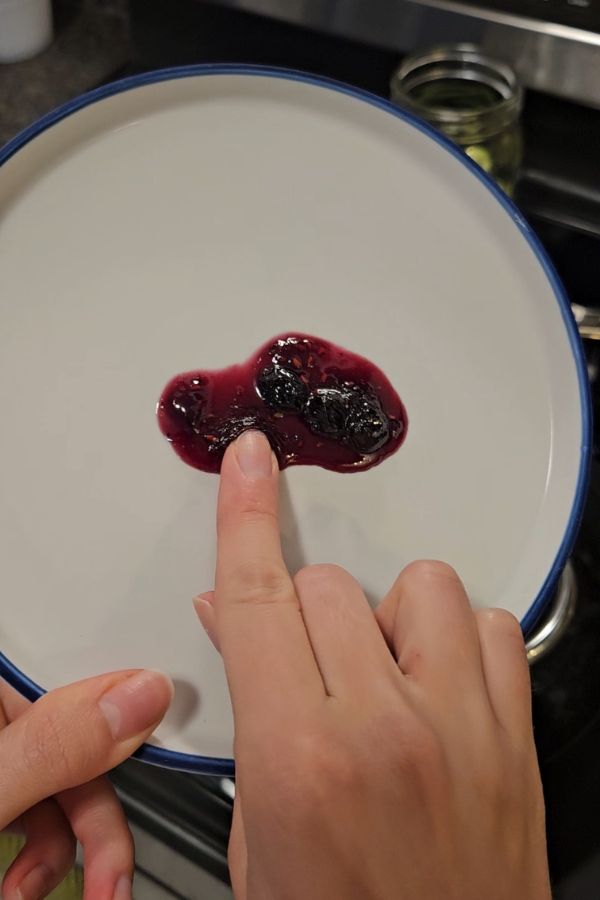
When your mixture has reduced a bit, grab that plate out of the fridge or freezer and put a tablespoon of hot jam onto it. Return the plate to the fridge or freezer for a minute or two. Remove and run your finger through your jam.
This gel test will tell you if your jam is ready to be jarred. If the jam is ready, it will wrinkle and will not flow into the imprint made by your finger. If the jam needs to cook for a bit longer, it will run into the imprint.
If you prefer a looser jam, consider skipping the gel test. Just know that this recipe won’t be fit for canning or shelf-stable storage.
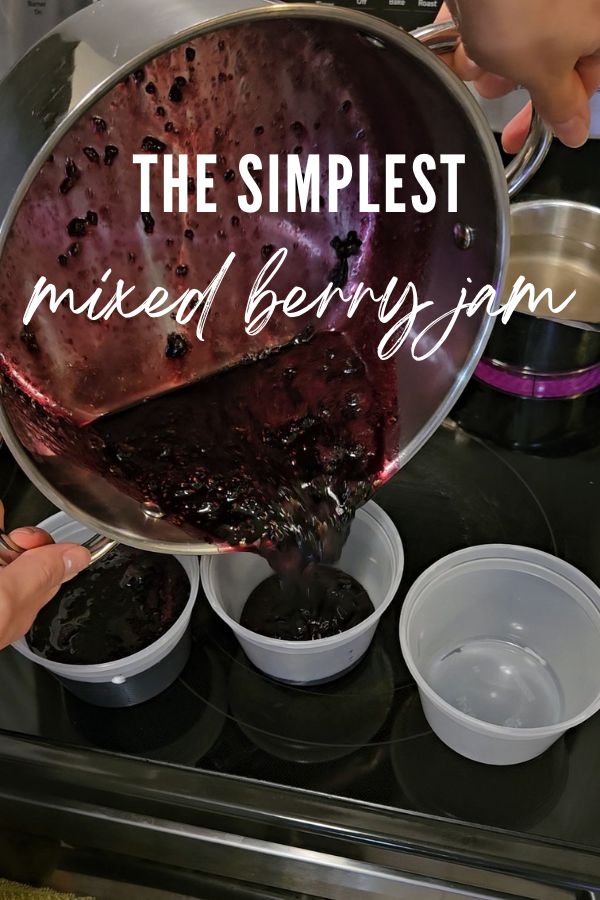
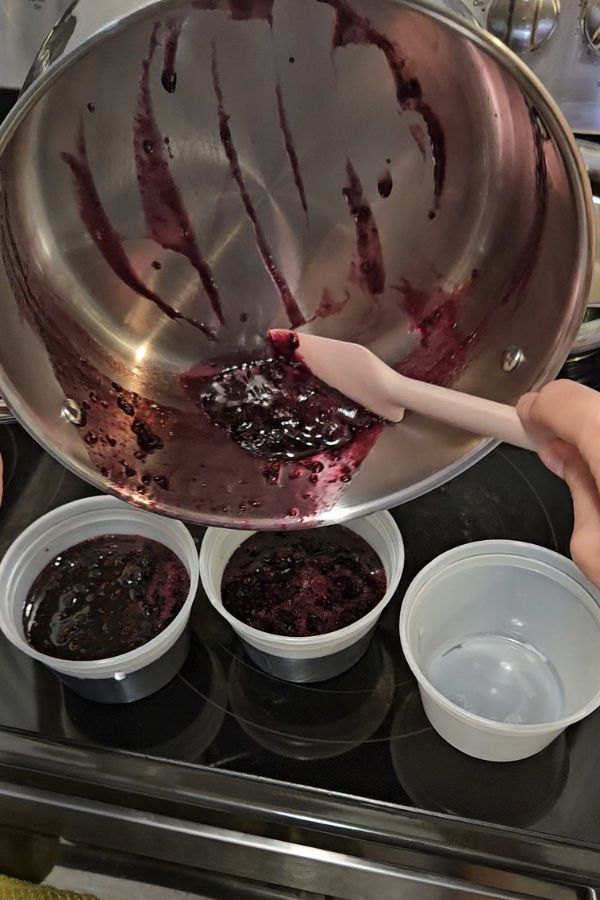
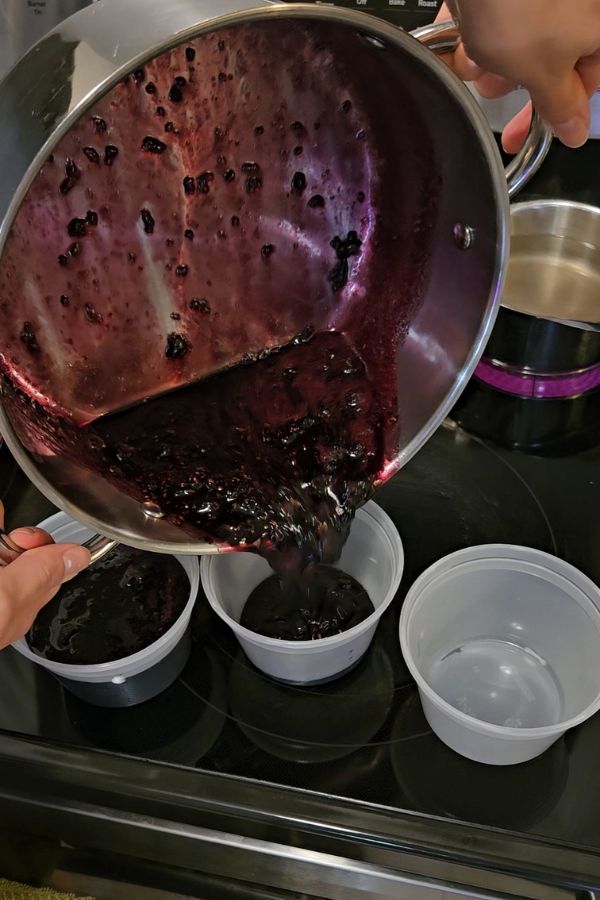
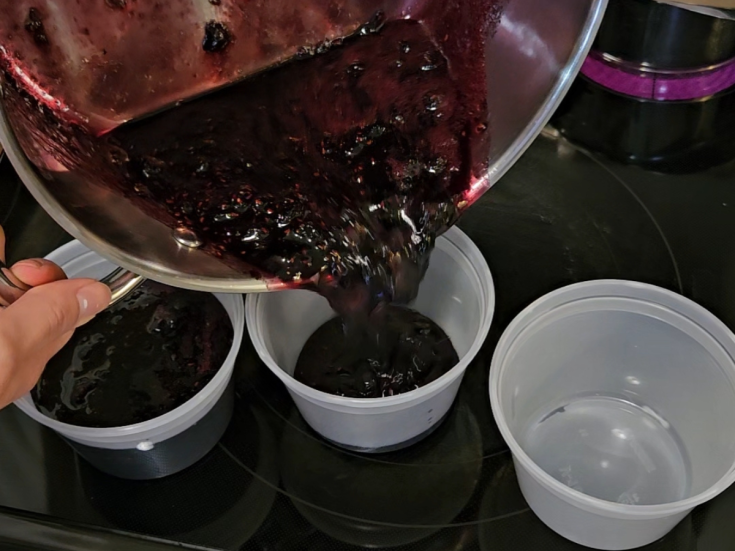
When your jam passes the gel test, transfer to clean jars. If you are gifting to friends and family, I recommend using half-pint jars. They are the perfect size for a sweet treat! This is a small batch recipe, so expect to only fill about 6 to 8 half-pint jars.
You can move forward with water bath canning, but be aware that this would be considered a rebel canning recipe. This recipe works great as a refrigerator jam recipe that you intend to use within two to four weeks. If I have any extras, I freeze them in a freezer-safe container and let the jam thaw in the fridge for 24 hours before eating it.
If you are freezing, leave about a half-inch of head space so the jam can safely expand without bursting your jars.
Let the jam cool in storage jars before moving to the fridge.
Do not attempt to can this recipe unless you are a master food preserver.
Freezer Jam Over Other Traditional Jam
Traditional jam usually uses pectin and has a smooth consistency with bits of fruit throughout. If you mash your berries finely enough, this recipe would be considered a traditional jam recipe.
Many freezer jams, however, might mimic preserves, which have thick chunks of fruit throughout the spread. Jelly is made from fruit juice and should have no fruit whatsoever.
Traditional jams are also canned in a water bath to make them shelf-stable. Freezer jam is not water bath canned, largely because it might not have the appropriate amount of pectin and acid that have been tested to keep shelf-stable jams safe for consumption.
Enjoy This Simple Recipe In So Many Ways
My kids enjoy this on homemade bread in their peanut butter and jelly sandwiches. We also love to eat this on English muffins, ice cream, and oatmeal.
Recipe Alternatives
If you are trying to stay away from pectin, chia seeds are a great alternative. The fiber found in their outer coat is what creates that sort of gel that will thicken your jam.
Say you don’t want mixed berry jam, but prefer something like a blueberry jam. The recipe measurements shouldn’t vary by too much. But know that since this recipe was written for mixed berries, I can’t guarantee the same results if you deviate from the recipe.
Other Jam Recipes
Are you looking to preserve summer? Check out this strawberry freezer jam recipe!
For even more rustic recipes and backyard homesteading inspiration, follow me on Pinterest!
Printable Mixed Berry Freezer Jam Recipe Card
Mixed Berry Jam (With No Pectin!)
If you are looking for an introductory canning recipe to get your feet wet, this mixed berry jam recipe is for you!
Ingredients
- 4 Cups Mixed Frozen Berries
- 3 Cups Cane Sugar
- 2 Tablespoons Lime Juice
Instructions
- Gather an 8-quart pot, a potato masher, sugar, lime juice, and mixed berries.
- Add your berries, lime juice, and sugar to your pot over medium-low heat on the stovetop. Stir occasionally so the berries and sugar don't scorch.
- Let the berries, sugar, and lime juice warm for about 10 minutes.
- After 10 minutes, run a potato masher through the berries. This won't be a smooth consistency.
- Transfer a plate in the fridge or freezer so it chills.
- Let the berry mixture simmer on the stovetop for 20 minutes, or until it reduces by about an inch.
- Grab that plate out of the fridge or freezer and put a tablespoon of hot jam onto it. Return the plate to the fridge or freezer for a minute or two. Remove and run your finger through your jam. If the jam is ready, it will wrinkle and will not flow into the imprint made by your finger. If the jam needs to cook for a bit longer, it will run into the imprint.
- When your jam passes the gel test, transfer to clean jars.
- Let the jam cool in storage jars before moving to the fridge. If you are freezing the jam, leave about a half-inch of head space so the jam can safely expand without bursting your jars.
- Store jam in the refrigerator for two to four weeks and in the freezer for up to 6 months.
Notes
I share my favorite kitchen gadgets and storage solutions in my Amazon Storefront!
Leave a Reply